Blowing Process

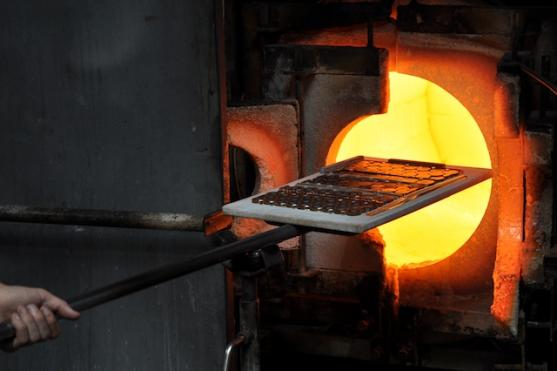
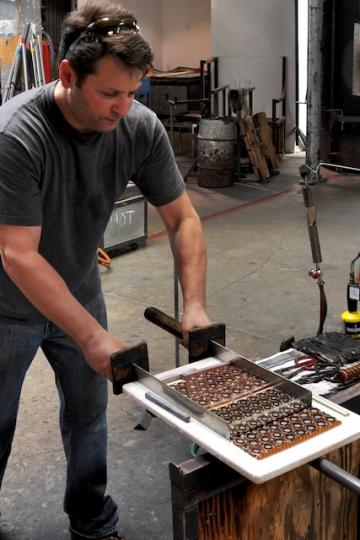
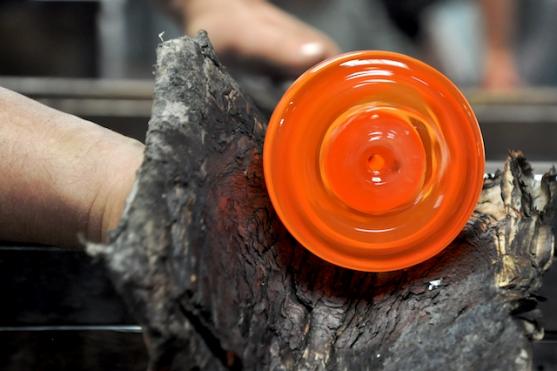
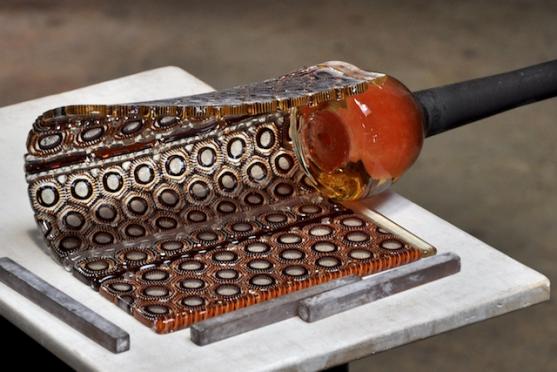
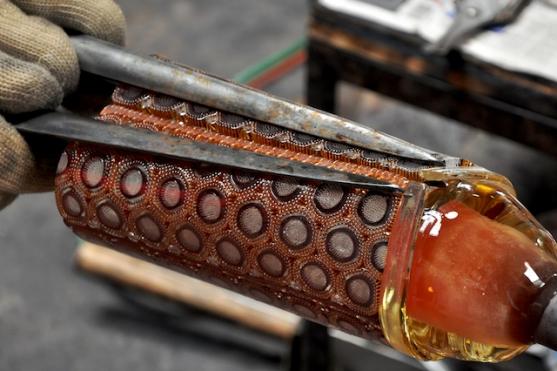
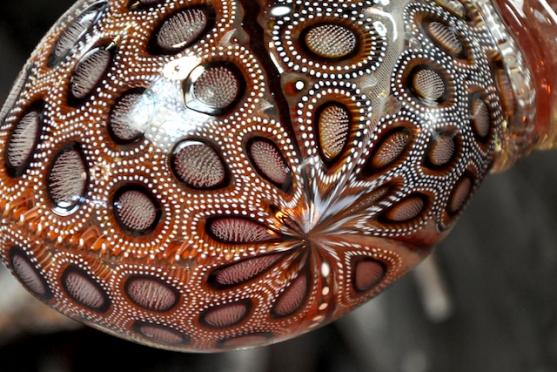
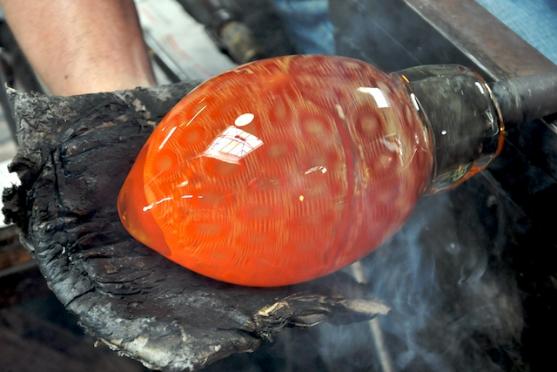
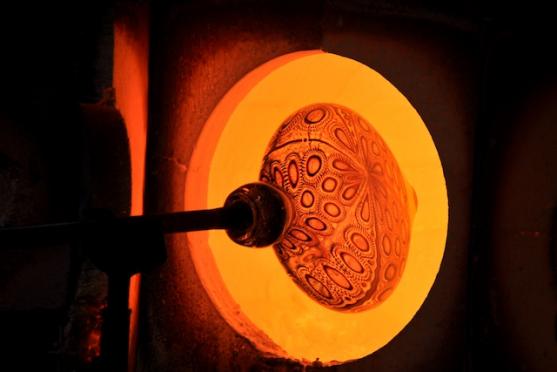
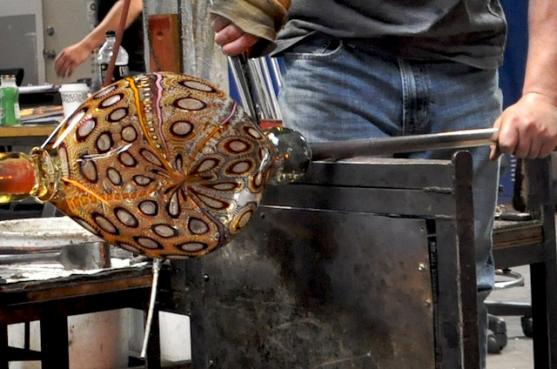
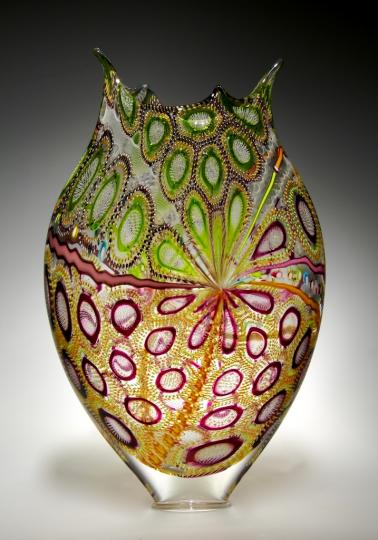
Before any glass can be blown, I create the patterns days earlier (see Making Cane and Making Murrine) and design the piece by arranging the patterns into a mosaic on a large ceramic kiln shelf.

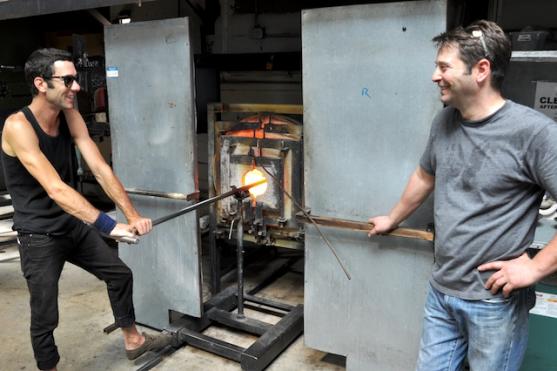
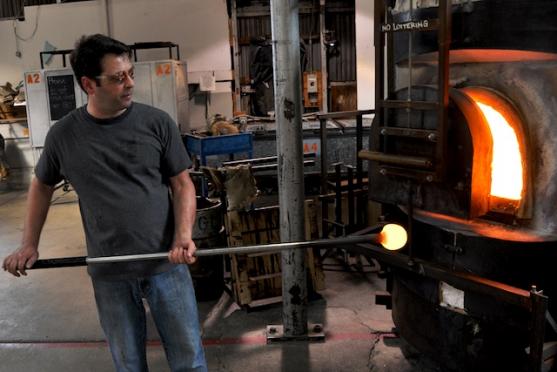
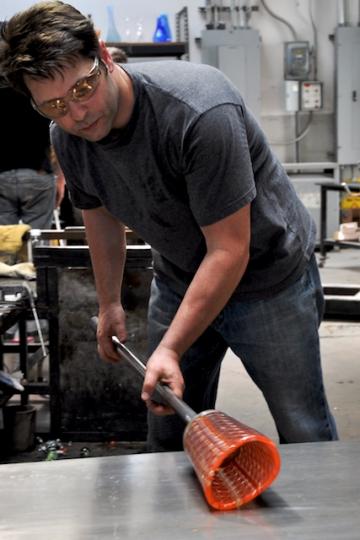
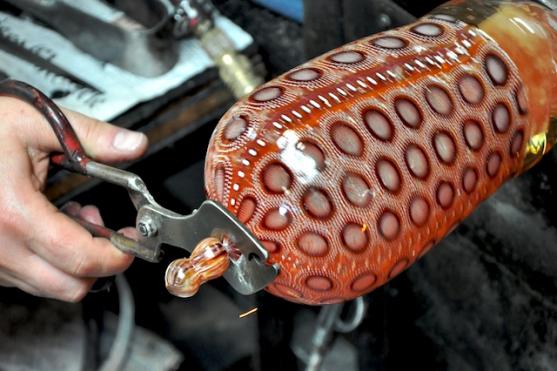
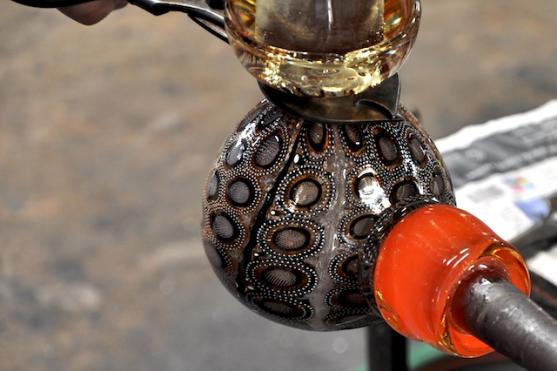
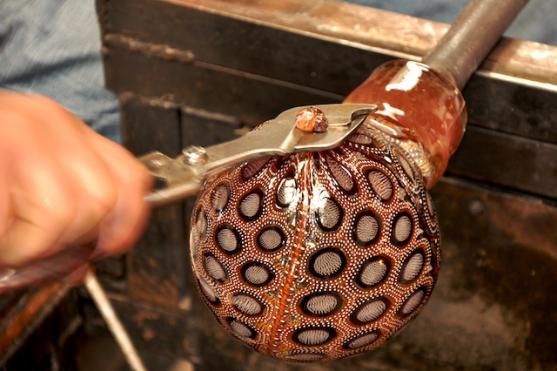
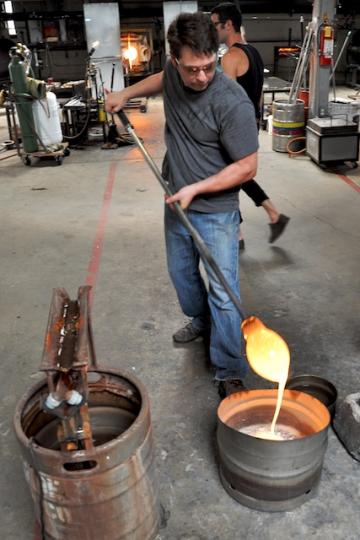
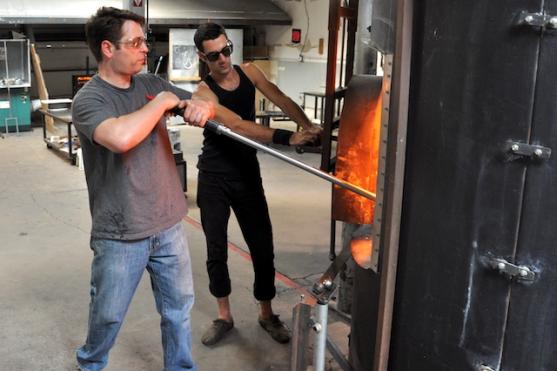
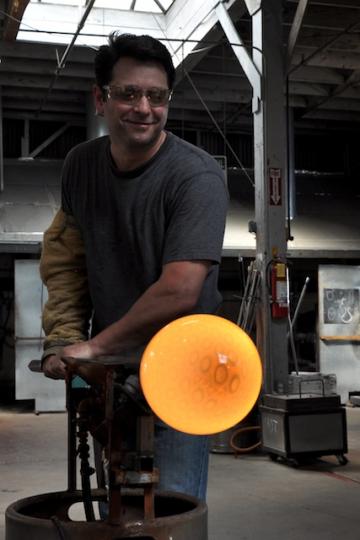
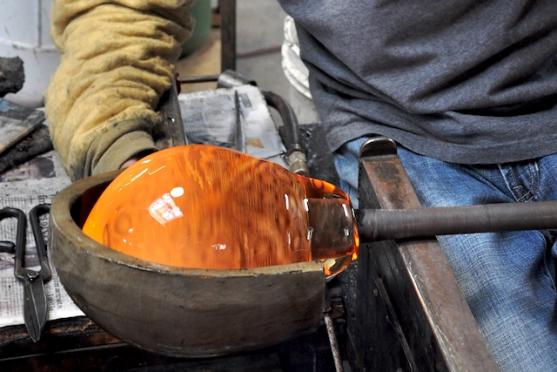
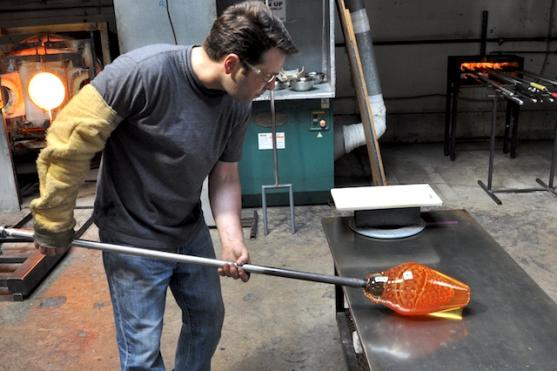
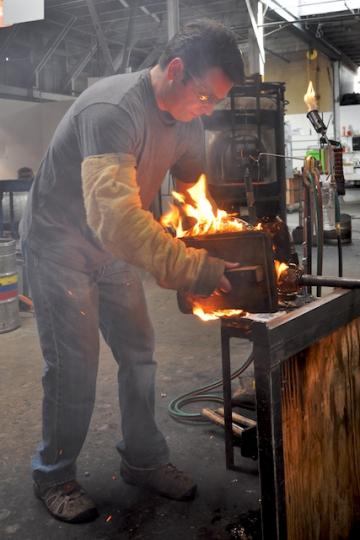
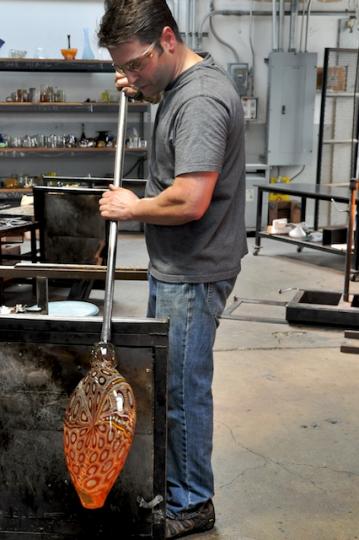
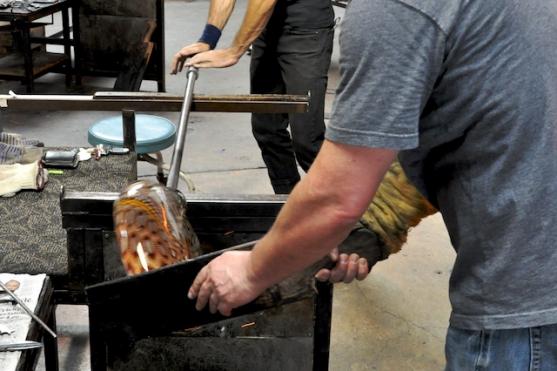
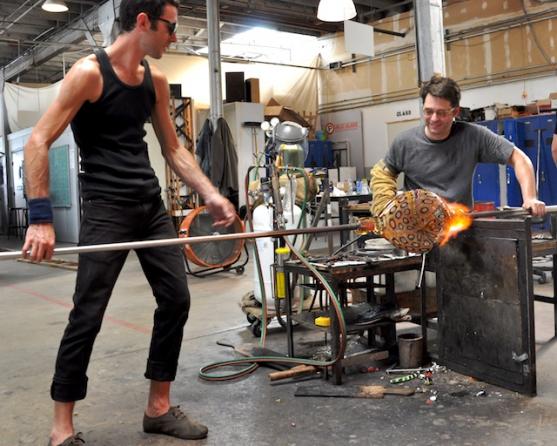
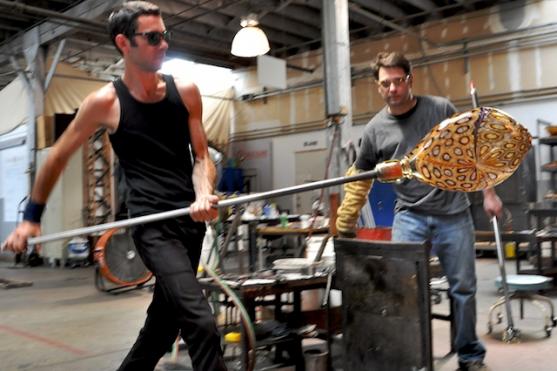
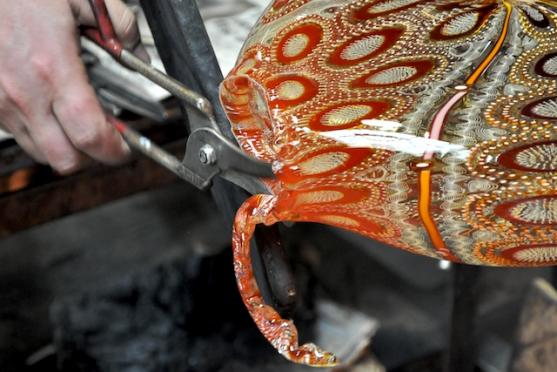
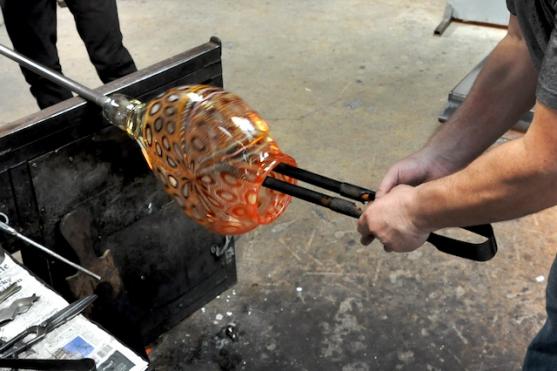
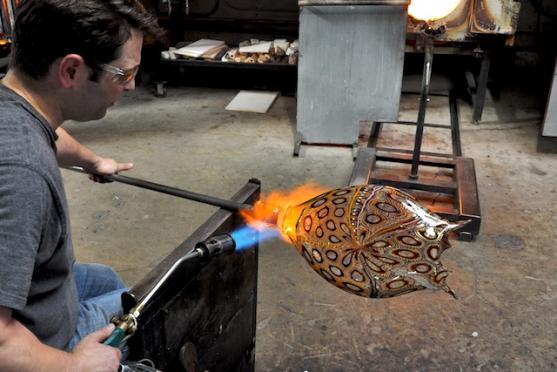
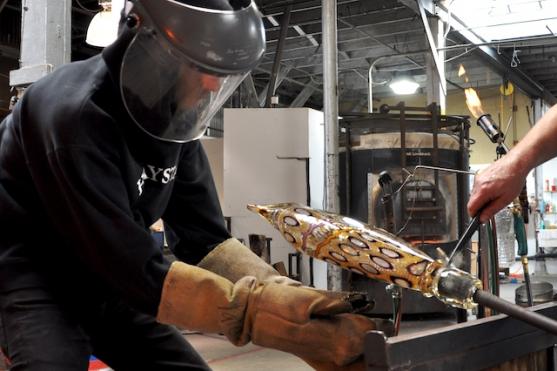
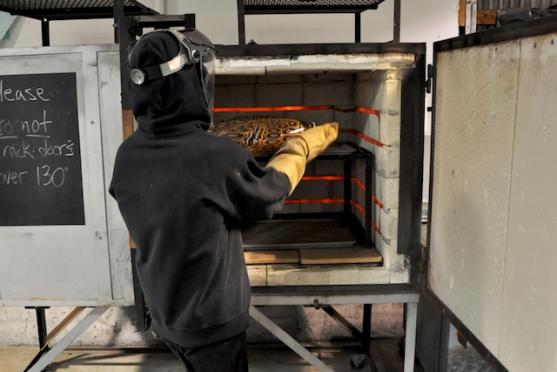
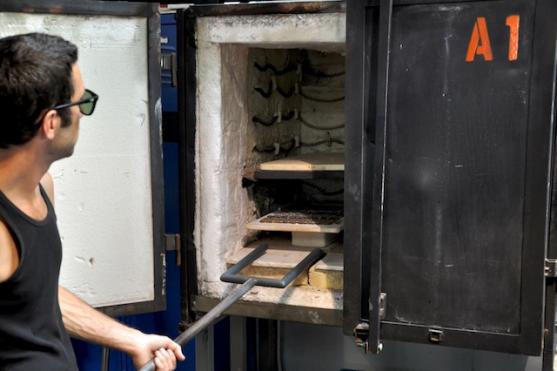
When I'm ready to blow the piece, the finished design is pre-heated in a kiln, then brought to the 'glory hole' (reheat furnace) for fusing.  This series of photos shows the process step-by-step but watch this video to see it in motion. 

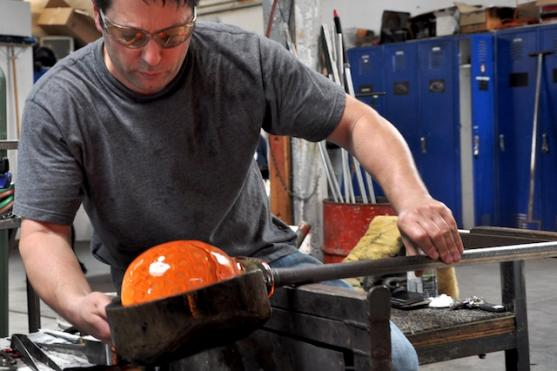
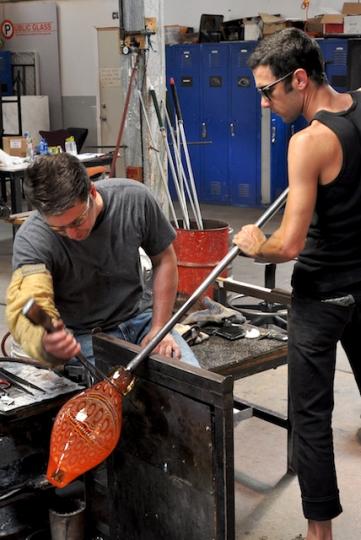
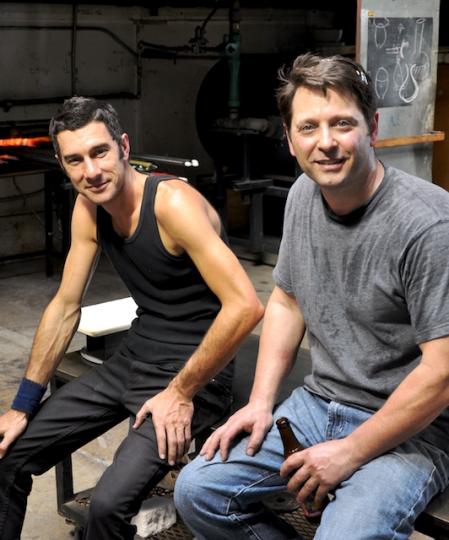
Virtually all glassblowers work in teams and I'm assisted here by Michael Patton, a skilled glassblower who's worked with me for years.  


The composition is taken for the first of many heats in the glory hole to soften and fuse the patterns.

As the cane and murrine is heated, the hundred or so individual pieces soften. I use a pair of metal tools to squeeze the pattern together to help these pieces fuse into a sheet.

The composition is heated gently a number of times.

Once the composition is fully fused, I gather clear glass out of the furnace by dipping a blowpipe in molten glass to create what's called a 'collar,' which will attach the pattern to the pipe.  This furnace contains a huge crucible with 600lbs of clear liquid glass sitting at 2100F degrees.

The collar is a donut of clear glass that is sized precisely so the circumference perfectly matches the length of the fused composition.

Since hot glass easily sticks to hot glass, when I roll my collar across the edge of the pattern they immediately stick together and I roll up the sheet onto the collar. 

With the pattern on the pipe, I carefully close the edges. Done correctly, the seam is impossible to find on the completed piece.

I heat and roll the glass on a steel table called a 'marver' to smooth out the surface and melt in the seams between the cane and murrine. This has to be done carefully so the pattern doesn't distort or twist.

When the pattern is completely melted together and seamless I close the very end of the cylinder which turns the pattern into a large bubble on the end of my blowpipe.

In order to achieve the desired pattern I switch the piece to a new blowpipe.

I carefully close the open part of the bubble where it was attached to the first blowpipe.

The highly patterned bubble is ready for gathering.  Gathering multiple layers of clear glass over the pattern is necessary to build up the mass to make a larger piece.

After dipping the bubble in molten glass ('encasing') I come out of the furnace and 'strip off' a bit of liquid glass to even out the gather.  The glass is the consistency of honey.

I carefully distribute the molten glass around the bubble, determining where I want the new coating of liquid glass.

As the heat from the gather soaks in and makes made the entire mass liquid again, I also re-shape the bubble using a wet pad of newspaper, a favorite tool of glassblowers everywhere.  If I were to stop turning at this point the glass would quickly sag and drip towards the floor.

Another gather encases the work with another layer of clear glass and provides additional mass to create the size of work I desire. 

After coming out of the furnace the pipe is hot and needs to be cooled before we shape the glass.

Once I have the glass I need, things move much more quickly. Here I use a large block to distribute the most recent layer of molten glass around the patterned bubble.

The marver (steel table) is used to shape and cool the sides and bottom of the bubble.  I slowly inflate it, carefully watching how it's behaving and get it ready to really blow and stretch into the shape I desire.

After inflating the bubble a bit, Michael reheats the glass so it's very hot and soft. At this point, while he turns the pipe I use a tool called 'jacks' to cut a groove or 'neckline' in the glass near the pipe. This is where we will break the glass off the blowpipe when we're ready to transfer it to another rod to finish the top of the piece.

Now we're working the glass very hot.  I use the wet newspaper pad to control where the piece inflates while Michael blows into the pipe (outside of the photo). Blowing when the glass is this hot is easy since the glass is soft and inflates readily.

When I have the shape I want, I flatten the piece by quickly rubbing and squeezing it between two large cork paddles. Since the glass is hot, the piece sags while I flatten it so the piece is flipped continually.

Throughout the process the piece is reheated every 20 seconds or so in order to keep the glass flexible.

Stretching the lower part of the work before putting on the bottom.

Once I'm satisfied with the shape, I spot heat the bottom with an extra-hot torch and use a wood paddle to form a crisp bottom.

Once the bottom is finished, we prepare to switch the piece to a 'punty' in order to finish the other side of the piece.  Here, Michael prepares the punty.

After we attach the punty, we let it cool for a few seconds until we feel it is rigid enough to support the weight of the piece. 

When the punty is the right temperature, I apply a few drops of water to the neckline. The water sizzles on the hot glass forming tiny cracks and I quickly rap the pipe with my tweezers which creates a strong vibration.

...and the piece breaks cleanly off the pipe. Michael now quickly brings it to the glory hole to heat the lip.

After the lip of the piece is throughly hot, it's tweezed and trimmed to even it out.

Using the pacioffis (wooden jacks) the lip is opened to the correct size.

The points are pulled with the diamond shears.

When the tips are completed and flame polished the piece is done.  Heating the punty and bottom of the piece is important to help balance the temperatures before it's put in the annealer to cool.

With a few drops of water on the crease in the punty and a couple taps of a wooden paddle...

...the piece breaks free.  Michael carries it with kevlar gloves into the annealer where it will cool slowly from 920F to room temperature in about 32 hours.

Cold beer is critically important to the end of the day.  Two days after blowing the work, it comes out of the annealer at room temperature and Finishing begins, which completes the work.

The finished piece after 32 hours of annealing and cooling as well as finishing/polishing the base.


Next -> Finishing